Complete zakum prequest guide/fighting guide/zakum anatomy
Eave forum :: Bosses & GPq :: Zakum
Page 1 of 1

Complete zakum prequest guide/fighting guide/zakum anatomy
![]() by galchu Thu May 19, 2011 1:49 am
by galchu Thu May 19, 2011 1:49 am
Pre-Quest :
Requirements:
Level 50 minimum. Completion required to enter Zakum's Lair

Upon reaching level 50 head over to the "chief's residence"
in El Nath and speak with your respective job instructor
(they are the job advancement NPC's who advance all characters to 3rd job status).
Ask him or her to allow you to participate in the Zakum dungeon quest.
Warning!!!
You cannot do the Zakum mine quest if you did not do the above tasks!
Essential Items!
1)

 Pots (Recover HP/MP)
2)
 Town Scroll (Emergency)
3)
 Dead Mine (Shorter travel time)
4)
 30 Golden Tooth - Obtainable from Minor Zombie
(Used for Zakum Mine Quest: Request For a Refinery)
Note:
You will also need 2 empty etc slots
(for containing of quest items)
Explore the Dead Mine (Level 1) (Time limit: 30 minutes)
You must complete stages 1-3 once each in order to fight Zakum.
Explore the Dead Mine (Level 1)
Video of person soloing the quest: Stage 1
https://www.youtube.com/watch?v=5i2BqPWcFdo
https://www.youtube.com/watch?v=SsyP787WL6Y
Make a party (You can form a party of yourself too = solo) and you are ready to do stage 1!
Guide to getting keys ONLY
Talk to Adobis and enter the mine map
When you enter, you will be at this map in front of number 9.
Rooms 10 and 7 lead to room 16.
Here is a map for room 16.
All these maps are called 16-(the red number). For example, room 1 in area 16 would be called 16-1.
You
need to collect 7 keys as part of stage 1. You are also given the
optional task of finding 30 out of 32 documents to exchange to get 5
“Return Scroll to Dead Mine”.
Whacking the rocks and chests located in each map can:
1. Summon 3 Mimics (only for chest)
2. Teleport you back to the first map (only for chest)
3. Drop Dead Mine Scrolls, Mesos, Elixers 100% and 50%, Fried Chicken, Red Bean Soup
4. Drop Keys
5. Drop Documents
Mimic stats
Level: 54
HP: 4,100
MP: 50
EXP: 165
Accuracy: 175
Avoid: 25
Key locations (7keys): 4-2 (rock), 9-2, 11-1, 14-1, 16-2, 16-3, 16-5 (rock).
Reward: 20k exp and a piece of fire ore
Party members needed: 2 --> 4
Note
that some chests can teleport you out so that’s why you search in a
group. Head into these rooms as a whole group and hit the object in the
bracket to get the keys:
* 4-2 (rock)
* 9-2 (chest)
* 11-1 (chest)
* 14-1 (chest)
* 16-2 (chest)
* 16-3 (chest)
* 16-5 (rock)
After you have the keys, head to map 16-5. There is a giant chest:
Drop the 7 keys on it and out will drop a fire ore:
Talk
to Aura after you have the ore and instruct all party members to walk
into the portal. You will gain one piece of fire ore per party member.
Guide to get both keys and documents
Reward: 5 dead mine scrolls, 30k exp and 1 piece of fire ore for hunting both keys and documents.
Party members: 6
Make 4 party members follow guide 2. The other two will hunt the documents in these locations:
Document locations (32 documents):
1-1, 1-2, 2-1, 3-1, 4-2, 5-1, 6-1, 7-1, 9-1, 10-1, 11-1, 12-1, 14-1, 15-1, 16-4, 16-5*, 16-6
*= This Document is located in a chest.
The following rooms all have 2 Documents:
3-2, 7-2, 8-1, 9-2, 10-2, 13-1
In addition, there's 3 documents located near the starting point.
Observe the Zakum Dungeon (Stage 2)
This
is a jump quest. It is very hard and has 2 stages. If you quit or get
disconnected while in the jump quest, you have to start from the
beginning (You’ll be teleported to the map “The door to Zakum”).
There is no guide, but here is a video:
https://www.youtube.com/watch?v=8q10m7voFrg
Request For a Refinery (Level 3)
Adobis
will now ask you for 30 gold tooths. Get these from hunting the miner
zombies (the ones with hats) at Dead Mine. Change channel at 'The Door
to Zakum' and you’ll end up at 'The Passage'. Change channel again and
you’ll end up at the 'Dead Tree' map. Walk right and go into the whole
to hunt. The tooths are yellow in colour not white.
Head back to Adobis, refine your 3 items from the 3 stages and you’ll gain 5 eye of fire.
Now you can summon Zakum 5 times.
~~~~~~~~~~~~~~~~~~~~~~~~~~~~~~~~~~~~~~~~~~~~~~~~~~~~~
As originally posted by Veladon/RamonNL
~~~~~~~~~~~~~~~~~~~~~~~~~~~~~~~~~~~~~~~~~~~~~~~~~~~~~
Zakum Fight guide + Stats and Anatomy:
Zakum fight guide
(With complete summon information)
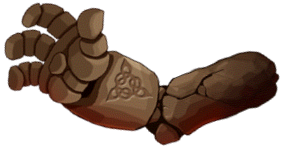
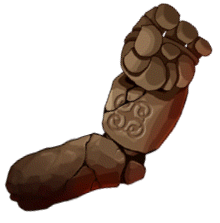
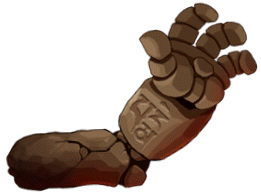
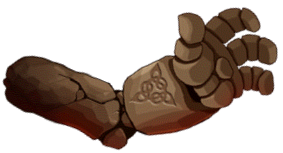
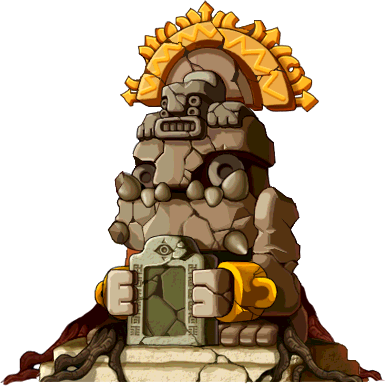
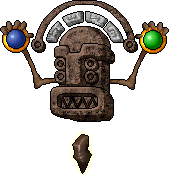
Zakum has a total of 11 parts, eight arms and three bodies.
He also summons six monsters.
Here are their stats:
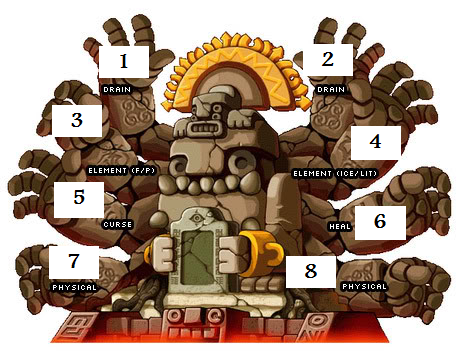
Zakum Arms
(Composed of 8 arms, 4 on each side possessing each unique attacks/buffs)
Zakum’s Arm 1
This arm drains HP and MP. It is on Zakum’s left side.
* Level: 140
* HP: 20,000,000
* MP: 18,000
* EXP: 1,680,000
* Phys. Atk: 505
* Mag. Atk: 460
* Phys. Def: 800
* Mag. Def: 800
* Accuracy: 200
* Avoid: 14
Zakum’s Arm 2
This arm drains HP and MP. It is on Zakum’s right side.
* Level: 140
* HP: 20,000,000
* MP: 18,000
* EXP: 1,680,000
* Phys. Atk: 505
* Mag. Atk: 460
* Phys. Def: 800
* Mag. Def: 800
* Accuracy: 200
* Avoid: 14
Zakum’s Arm 3
This arm uses Fire and Poison spells. It is on Zakum’s left side.
* Level: 140
* HP: 20,000,000
* MP: 18,000
* EXP: 1,120,000
* Phys. Atk: 530
* Mag. Atk: 485
* Phys. Def: 800
* Mag. Def: 950
* Accuracy: 200
* Avoid: 14
Zakum’s Arm 4
This arm uses Ice and Lightning spells. It is on Zakum’s right side.
* Level: 140
* HP: 20,000,000
* MP: 18,000
* EXP: 1,680,000
* Phys. Atk: 505
* Mag. Atk: 460
* Phys. Def: 800
* Mag. Def: 800
* Accuracy: 200
* Avoid: 14
Zakum’s Arm 5
This arm causes status conditions. It is on Zakum’s left side.
* Level: 140
* HP: 25,000,000
* MP: 18,000
* EXP: 1,400,000
* Phys. Atk: 550
* Mag. Atk: 515
* Phys. Def: 1050
* Mag. Def: 1050
* Accuracy: 200
* Avoid: 14
Zakum’s Arm 6
This arm heals Zakum and his arms at around 50,000 to 55,000 HP per 30 seconds. It is on Zakum’s right side.
* Level: 140
* HP: 25,000,000
* MP: 18,000
* EXP: 1,400,000
* Phys. Atk: 550
* Mag. Atk: 515
* Phys. Def: 1050
* Mag. Def: 1050
* Accuracy: 200
* Avoid: 14

Zakum’s Arm 7
This arm inflicts physical damage. It is on Zakum’s left side.
* Level: 140
* HP: 25,300,000
* MP: 18,000
* EXP: 1,030,400
* Phys. Atk: 510
* Mag. Atk: 500
* Phys. Def: 1050
* Mag. Def: 750
* Accuracy: 200
* Avoid: 14
Zakum’s Arm 8
This arm inflicts physical damage. It is on Zakum’s right side.
* Level: 140
* HP: 25,300,000
* MP: 18,000
* EXP: 1,030,400
* Phys. Atk: 510
* Mag. Atk: 500
* Phys. Def: 1050
* Mag. Def: 750
* Accuracy: 200
* Avoid: 14
Zakum Bodies
(3 distinct deterioration of the body, each with unique HP/MP and ranging attacks)
Zakum Body Stage 1

This is the form Zakum will be in when he is summoned.
Summons Boogie, Cuzco, Opachu, Pachu, Puco and Punco.
* Level: 140
* HP: 66,000,000
* MP: 30,000
* EXP: 0
* Phys. Atk: 980
* Mag. Atk: 530
* Phys. Def: 1,000
* Mag. Def: 1,000
* Accuracy: 250
* Avoid: 12
Zakum Body Stage 2
After you kill Zakum 1, this will take his place.
Summons Boogie, Cuzco, Opachu, Pachu, Puco and Punco.
* Level: 140
* HP: 88,000,000
* MP: 35,000
* EXP: 0
* Phys. Atk: 1,040
* Mag. Atk: 550
* Phys. Def: 1,100
* Mag. Def: 1,300
* Accuracy: 250
* Avoid: 14
Zakum Body Stage 3
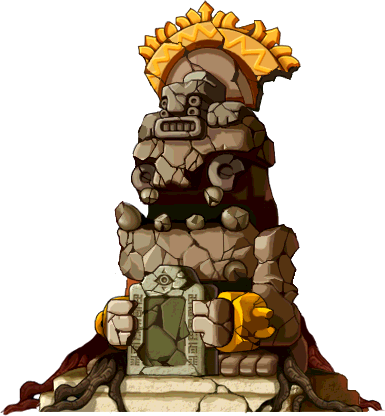
Zakum’s final form, spawns after Zakum 2 is killed.
Summons Boogie, Cuzco, Opachu, Pachu, Puco and Punco.
* Level: 140
* HP: 88,000,000
* MP: 35,000
* EXP: 7,000,000
* Phys. Atk: 1,080
* Mag. Atk: 570
* Phys. Def: 1,200
* Mag. Def: 1,500
* Accuracy: 250
* Avoid: 16
Totaling up his 8 arms and 3 bodies, Zakum has a TOTAL of 482.1 Million HP.
Summons

Boogie
(Strong against holy attacks)
* Level: 35
* HP: 14,800
* MP: 500
* EXP: 400
* Phys. Atk: 180
* Mag. Atk: 300
* Phys. Def: 250
* Mag. Def: 300
* Accuracy: 250
* Avoid: 35

Puco
* Level: 63
* HP: 20,000
* MP: 100
* EXP: 190
* Phys. Atk: 257
* Mag. Atk: 0
* Phys. Def: 200
* Mag. Def: 220
* Accuracy: 145
* Avoid: 36

Pachu
(Strong against holy, lightning and poison attacks)
(Immune to fire and ice)
(Explodes when killed)
* Level: 66
* HP: 38,000
* MP: 600
* EXP: 200
* Phys. Atk: 300
* Mag. Atk: 420
* Phys. Def: 250
* Mag. Def: 400
* Accuracy: 150
* Avoid: 35
Punco
(Strong against holy)
* Level: 67
* HP: 40,000
* MP: 700
* EXP: 210
* Phys. Atk: 310
* Mag. Atk: 435
* Phys. Def: 270
* Mag. Def: 410
* Accuracy: 165
* Avoid: 37
Opachu
(Strong against holy, lightning and poison attacks)
(Immune to ice)
(Weak to fire)
(When dies, changes to Pachu)
* Level: 70
* HP: 60,000
* MP: 1,000
* EXP: 250
* Phys. Atk: 400
* Mag. Atk: 600
* Phys. Def: 350
* Mag. Def: 550
* Accuracy: 180
* Avoid: 50
Cuzco
(Strong against holy attacks)
* Level: 69
* HP: 60,000
* MP: 1,000
* EXP: 240
* Phys. Atk: 372
* Mag. Atk: 565
* Phys. Def: 320
* Mag. Def: 530
* Accuracy: 170
* Avoid: 40
Entrance limit twice a day (2 times every 24 hours).
Before the Battle Begins
There are certain conditions that must be met before Adobis will allow you to venture into Zakum's Altar.
The following is a list of necessary preparations.
* 1) Complete the 3 Zakum Quests. They must be done before you are allowed into the Altar
* 2) Have at least one "Eye of Fire" in your possession. They are given by the Zakum quests
* 3) Have at least 2000 HP after wearing your equipment, but before receiving Hyper Body
The following is a list of recommended precautions.
* 1) MapleStory graphics is set to LOW
* 2) Exit all other programs besides MapleStory, such as Media Players, AntiVirus, etc.
* 3) Defragment your Hard Drive the night before your run
The Arms
The first part of the battle is the arms. These are killed first and in a certain order:
* 8th
* 6th
* 7th (CB party ONLY!)
* 4th
* 2nd (All parties move to other side after this arm dies)
* 3rd
* 1st
THE 5th ARM IS THE LAST ARM TO BE KILLED.
It does NO damage. This is break time before the tough part begins.
Some tips:
An important tip to surviving Zakum is to not rely on your Priest.
Your Priest is in your party to help you in the event that you lag and
cannot pot. Otherwise your primary healing will be coming from potions.
Arms:
Zakum will be summoned and the expedition will be located at the
bottom right. When both bottom right arms are killed, the buyer party
will move to the bottom left corner and stay there for the rest of the
battle. While the arms are alive, the body does no touch damage, so it
is safe to walk across the middle of the map, but remember the arms
still hurt you for about 2400 damage if you touch them. There are also
teleporters at the top of each side that take you across the map. Arms
have various attacks. Physical and magic attacks do up to 2000 damage.
Poison clouds do 800 damage. Touching the arms does about 2400
damage. The third arm down on the left side also causes status effects
(Seal, Curse, Weaken, Blind).
Body:
Touching the body results in anywhere
between 6000 to 11000 dmg,
You don't want to get anywhere close
to Zakum during the body stages.
Zakum has 3 primary attacks.
* 1) Lightning Strike - Does a maximum of 3200 damage
* 2) Falling boulders - Does 2700 to 2800 damage to all players hit
* 3) Apocalypse - Reduces HP and MP to 1
~~~~~~~~~~~~~~~~~~~~~~~~~~~~~~~~~~~~~~~~~~~~~~~~~~~~~
As originally posted by Veladon - Edited by Galchu
Requirements:
Level 50 minimum. Completion required to enter Zakum's Lair
Upon reaching level 50 head over to the "chief's residence"
in El Nath and speak with your respective job instructor
(they are the job advancement NPC's who advance all characters to 3rd job status).
Ask him or her to allow you to participate in the Zakum dungeon quest.
Warning!!!
You cannot do the Zakum mine quest if you did not do the above tasks!
Essential Items!
1)
Pots (Recover HP/MP)2)
Town Scroll (Emergency)3)
Dead Mine (Shorter travel time)4)
30 Golden Tooth - Obtainable from Minor Zombie (Used for Zakum Mine Quest: Request For a Refinery)
Note:
You will also need 2 empty etc slots
(for containing of quest items)
Explore the Dead Mine (Level 1) (Time limit: 30 minutes)
You must complete stages 1-3 once each in order to fight Zakum.
Explore the Dead Mine (Level 1)
Video of person soloing the quest: Stage 1
https://www.youtube.com/watch?v=5i2BqPWcFdo
https://www.youtube.com/watch?v=SsyP787WL6Y
Make a party (You can form a party of yourself too = solo) and you are ready to do stage 1!
Guide to getting keys ONLY
Talk to Adobis and enter the mine map
When you enter, you will be at this map in front of number 9.
Rooms 10 and 7 lead to room 16.
Here is a map for room 16.
All these maps are called 16-(the red number). For example, room 1 in area 16 would be called 16-1.
You
need to collect 7 keys as part of stage 1. You are also given the
optional task of finding 30 out of 32 documents to exchange to get 5
“Return Scroll to Dead Mine”.
Whacking the rocks and chests located in each map can:
1. Summon 3 Mimics (only for chest)
2. Teleport you back to the first map (only for chest)
3. Drop Dead Mine Scrolls, Mesos, Elixers 100% and 50%, Fried Chicken, Red Bean Soup
4. Drop Keys
5. Drop Documents
Mimic stats
Level: 54
HP: 4,100
MP: 50
EXP: 165
Accuracy: 175
Avoid: 25
Key locations (7keys): 4-2 (rock), 9-2, 11-1, 14-1, 16-2, 16-3, 16-5 (rock).
Reward: 20k exp and a piece of fire ore
Party members needed: 2 --> 4
Note
that some chests can teleport you out so that’s why you search in a
group. Head into these rooms as a whole group and hit the object in the
bracket to get the keys:
* 4-2 (rock)
* 9-2 (chest)
* 11-1 (chest)
* 14-1 (chest)
* 16-2 (chest)
* 16-3 (chest)
* 16-5 (rock)
After you have the keys, head to map 16-5. There is a giant chest:
Drop the 7 keys on it and out will drop a fire ore:
Talk
to Aura after you have the ore and instruct all party members to walk
into the portal. You will gain one piece of fire ore per party member.
Guide to get both keys and documents
Reward: 5 dead mine scrolls, 30k exp and 1 piece of fire ore for hunting both keys and documents.
Party members: 6
Make 4 party members follow guide 2. The other two will hunt the documents in these locations:
Document locations (32 documents):
1-1, 1-2, 2-1, 3-1, 4-2, 5-1, 6-1, 7-1, 9-1, 10-1, 11-1, 12-1, 14-1, 15-1, 16-4, 16-5*, 16-6
*= This Document is located in a chest.
The following rooms all have 2 Documents:
3-2, 7-2, 8-1, 9-2, 10-2, 13-1
In addition, there's 3 documents located near the starting point.
Observe the Zakum Dungeon (Stage 2)
This
is a jump quest. It is very hard and has 2 stages. If you quit or get
disconnected while in the jump quest, you have to start from the
beginning (You’ll be teleported to the map “The door to Zakum”).
There is no guide, but here is a video:
https://www.youtube.com/watch?v=8q10m7voFrg
Request For a Refinery (Level 3)
Adobis
will now ask you for 30 gold tooths. Get these from hunting the miner
zombies (the ones with hats) at Dead Mine. Change channel at 'The Door
to Zakum' and you’ll end up at 'The Passage'. Change channel again and
you’ll end up at the 'Dead Tree' map. Walk right and go into the whole
to hunt. The tooths are yellow in colour not white.
Head back to Adobis, refine your 3 items from the 3 stages and you’ll gain 5 eye of fire.
Now you can summon Zakum 5 times.
~~~~~~~~~~~~~~~~~~~~~~~~~~~~~~~~~~~~~~~~~~~~~~~~~~~~~
As originally posted by Veladon/RamonNL
~~~~~~~~~~~~~~~~~~~~~~~~~~~~~~~~~~~~~~~~~~~~~~~~~~~~~
Zakum Fight guide + Stats and Anatomy:
Zakum fight guide
(With complete summon information)
Zakum has a total of 11 parts, eight arms and three bodies.
He also summons six monsters.
Here are their stats:
Zakum Arms
(Composed of 8 arms, 4 on each side possessing each unique attacks/buffs)
Zakum’s Arm 1
This arm drains HP and MP. It is on Zakum’s left side.
* Level: 140
* HP: 20,000,000
* MP: 18,000
* EXP: 1,680,000
* Phys. Atk: 505
* Mag. Atk: 460
* Phys. Def: 800
* Mag. Def: 800
* Accuracy: 200
* Avoid: 14
Zakum’s Arm 2
This arm drains HP and MP. It is on Zakum’s right side.
* Level: 140
* HP: 20,000,000
* MP: 18,000
* EXP: 1,680,000
* Phys. Atk: 505
* Mag. Atk: 460
* Phys. Def: 800
* Mag. Def: 800
* Accuracy: 200
* Avoid: 14
Zakum’s Arm 3
This arm uses Fire and Poison spells. It is on Zakum’s left side.
* Level: 140
* HP: 20,000,000
* MP: 18,000
* EXP: 1,120,000
* Phys. Atk: 530
* Mag. Atk: 485
* Phys. Def: 800
* Mag. Def: 950
* Accuracy: 200
* Avoid: 14
Zakum’s Arm 4
This arm uses Ice and Lightning spells. It is on Zakum’s right side.
* Level: 140
* HP: 20,000,000
* MP: 18,000
* EXP: 1,680,000
* Phys. Atk: 505
* Mag. Atk: 460
* Phys. Def: 800
* Mag. Def: 800
* Accuracy: 200
* Avoid: 14
Zakum’s Arm 5
This arm causes status conditions. It is on Zakum’s left side.
* Level: 140
* HP: 25,000,000
* MP: 18,000
* EXP: 1,400,000
* Phys. Atk: 550
* Mag. Atk: 515
* Phys. Def: 1050
* Mag. Def: 1050
* Accuracy: 200
* Avoid: 14
Zakum’s Arm 6
This arm heals Zakum and his arms at around 50,000 to 55,000 HP per 30 seconds. It is on Zakum’s right side.
* Level: 140
* HP: 25,000,000
* MP: 18,000
* EXP: 1,400,000
* Phys. Atk: 550
* Mag. Atk: 515
* Phys. Def: 1050
* Mag. Def: 1050
* Accuracy: 200
* Avoid: 14
Zakum’s Arm 7
This arm inflicts physical damage. It is on Zakum’s left side.
* Level: 140
* HP: 25,300,000
* MP: 18,000
* EXP: 1,030,400
* Phys. Atk: 510
* Mag. Atk: 500
* Phys. Def: 1050
* Mag. Def: 750
* Accuracy: 200
* Avoid: 14
Zakum’s Arm 8
This arm inflicts physical damage. It is on Zakum’s right side.
* Level: 140
* HP: 25,300,000
* MP: 18,000
* EXP: 1,030,400
* Phys. Atk: 510
* Mag. Atk: 500
* Phys. Def: 1050
* Mag. Def: 750
* Accuracy: 200
* Avoid: 14
Zakum Bodies
(3 distinct deterioration of the body, each with unique HP/MP and ranging attacks)
Zakum Body Stage 1
This is the form Zakum will be in when he is summoned.
Summons Boogie, Cuzco, Opachu, Pachu, Puco and Punco.
* Level: 140
* HP: 66,000,000
* MP: 30,000
* EXP: 0
* Phys. Atk: 980
* Mag. Atk: 530
* Phys. Def: 1,000
* Mag. Def: 1,000
* Accuracy: 250
* Avoid: 12
Zakum Body Stage 2
After you kill Zakum 1, this will take his place.
Summons Boogie, Cuzco, Opachu, Pachu, Puco and Punco.
* Level: 140
* HP: 88,000,000
* MP: 35,000
* EXP: 0
* Phys. Atk: 1,040
* Mag. Atk: 550
* Phys. Def: 1,100
* Mag. Def: 1,300
* Accuracy: 250
* Avoid: 14
Zakum Body Stage 3
Zakum’s final form, spawns after Zakum 2 is killed.
Summons Boogie, Cuzco, Opachu, Pachu, Puco and Punco.
* Level: 140
* HP: 88,000,000
* MP: 35,000
* EXP: 7,000,000
* Phys. Atk: 1,080
* Mag. Atk: 570
* Phys. Def: 1,200
* Mag. Def: 1,500
* Accuracy: 250
* Avoid: 16
Totaling up his 8 arms and 3 bodies, Zakum has a TOTAL of 482.1 Million HP.
Summons
Boogie
(Strong against holy attacks)
* Level: 35
* HP: 14,800
* MP: 500
* EXP: 400
* Phys. Atk: 180
* Mag. Atk: 300
* Phys. Def: 250
* Mag. Def: 300
* Accuracy: 250
* Avoid: 35
Puco
* Level: 63
* HP: 20,000
* MP: 100
* EXP: 190
* Phys. Atk: 257
* Mag. Atk: 0
* Phys. Def: 200
* Mag. Def: 220
* Accuracy: 145
* Avoid: 36
Pachu
(Strong against holy, lightning and poison attacks)
(Immune to fire and ice)
(Explodes when killed)
* Level: 66
* HP: 38,000
* MP: 600
* EXP: 200
* Phys. Atk: 300
* Mag. Atk: 420
* Phys. Def: 250
* Mag. Def: 400
* Accuracy: 150
* Avoid: 35
Punco
(Strong against holy)
* Level: 67
* HP: 40,000
* MP: 700
* EXP: 210
* Phys. Atk: 310
* Mag. Atk: 435
* Phys. Def: 270
* Mag. Def: 410
* Accuracy: 165
* Avoid: 37
Opachu
(Strong against holy, lightning and poison attacks)
(Immune to ice)
(Weak to fire)
(When dies, changes to Pachu)
* Level: 70
* HP: 60,000
* MP: 1,000
* EXP: 250
* Phys. Atk: 400
* Mag. Atk: 600
* Phys. Def: 350
* Mag. Def: 550
* Accuracy: 180
* Avoid: 50
Cuzco
(Strong against holy attacks)
* Level: 69
* HP: 60,000
* MP: 1,000
* EXP: 240
* Phys. Atk: 372
* Mag. Atk: 565
* Phys. Def: 320
* Mag. Def: 530
* Accuracy: 170
* Avoid: 40
Entrance limit twice a day (2 times every 24 hours).
Before the Battle Begins
There are certain conditions that must be met before Adobis will allow you to venture into Zakum's Altar.
The following is a list of necessary preparations.
* 1) Complete the 3 Zakum Quests. They must be done before you are allowed into the Altar
* 2) Have at least one "Eye of Fire" in your possession. They are given by the Zakum quests
* 3) Have at least 2000 HP after wearing your equipment, but before receiving Hyper Body
The following is a list of recommended precautions.
* 1) MapleStory graphics is set to LOW
* 2) Exit all other programs besides MapleStory, such as Media Players, AntiVirus, etc.
* 3) Defragment your Hard Drive the night before your run
The Arms
The first part of the battle is the arms. These are killed first and in a certain order:
* 8th
* 6th
* 7th (CB party ONLY!)
* 4th
* 2nd (All parties move to other side after this arm dies)
* 3rd
* 1st
THE 5th ARM IS THE LAST ARM TO BE KILLED.
It does NO damage. This is break time before the tough part begins.
Some tips:
An important tip to surviving Zakum is to not rely on your Priest.
Your Priest is in your party to help you in the event that you lag and
cannot pot. Otherwise your primary healing will be coming from potions.
Arms:
Zakum will be summoned and the expedition will be located at the
bottom right. When both bottom right arms are killed, the buyer party
will move to the bottom left corner and stay there for the rest of the
battle. While the arms are alive, the body does no touch damage, so it
is safe to walk across the middle of the map, but remember the arms
still hurt you for about 2400 damage if you touch them. There are also
teleporters at the top of each side that take you across the map. Arms
have various attacks. Physical and magic attacks do up to 2000 damage.
Poison clouds do 800 damage. Touching the arms does about 2400
damage. The third arm down on the left side also causes status effects
(Seal, Curse, Weaken, Blind).
Body:
Touching the body results in anywhere
between 6000 to 11000 dmg,
You don't want to get anywhere close
to Zakum during the body stages.
Zakum has 3 primary attacks.
* 1) Lightning Strike - Does a maximum of 3200 damage
* 2) Falling boulders - Does 2700 to 2800 damage to all players hit
* 3) Apocalypse - Reduces HP and MP to 1
~~~~~~~~~~~~~~~~~~~~~~~~~~~~~~~~~~~~~~~~~~~~~~~~~~~~~
As originally posted by Veladon - Edited by Galchu
galchu- Posts : 5
Join date : 2011-05-17
![]()
![]()
Eave forum :: Bosses & GPq :: Zakum
Page 1 of 1
Permissions in this forum:
You cannot reply to topics in this forum|
|
|